Registration is typically your supporter's first experience, so make it as inviting, quick, and seamless as possible. As they arrive, confirm and capture the information needed, complete their registration and send them the Welcome Text linking them to the items to browse, bid, or buy.
Watch a Video
Check-in a User
Tip: Prior to your event, merge duplicate users to ensure a quick and seamless checkin process for your guests and volunteers. This is especially important when bid numbers have been assigned.
Check-in supporters to confirm their contact information, confirm they have a credit card on their account for future payments or add a card, and complete their registration if they have not done so already.
- From the Admin Navigation, select Users > Check-in.
- Type a full or partial name in the search field and click Search.
- Clicking Search without enter a name will show all users in alpha order by last name.
- Locate the person and click Select.
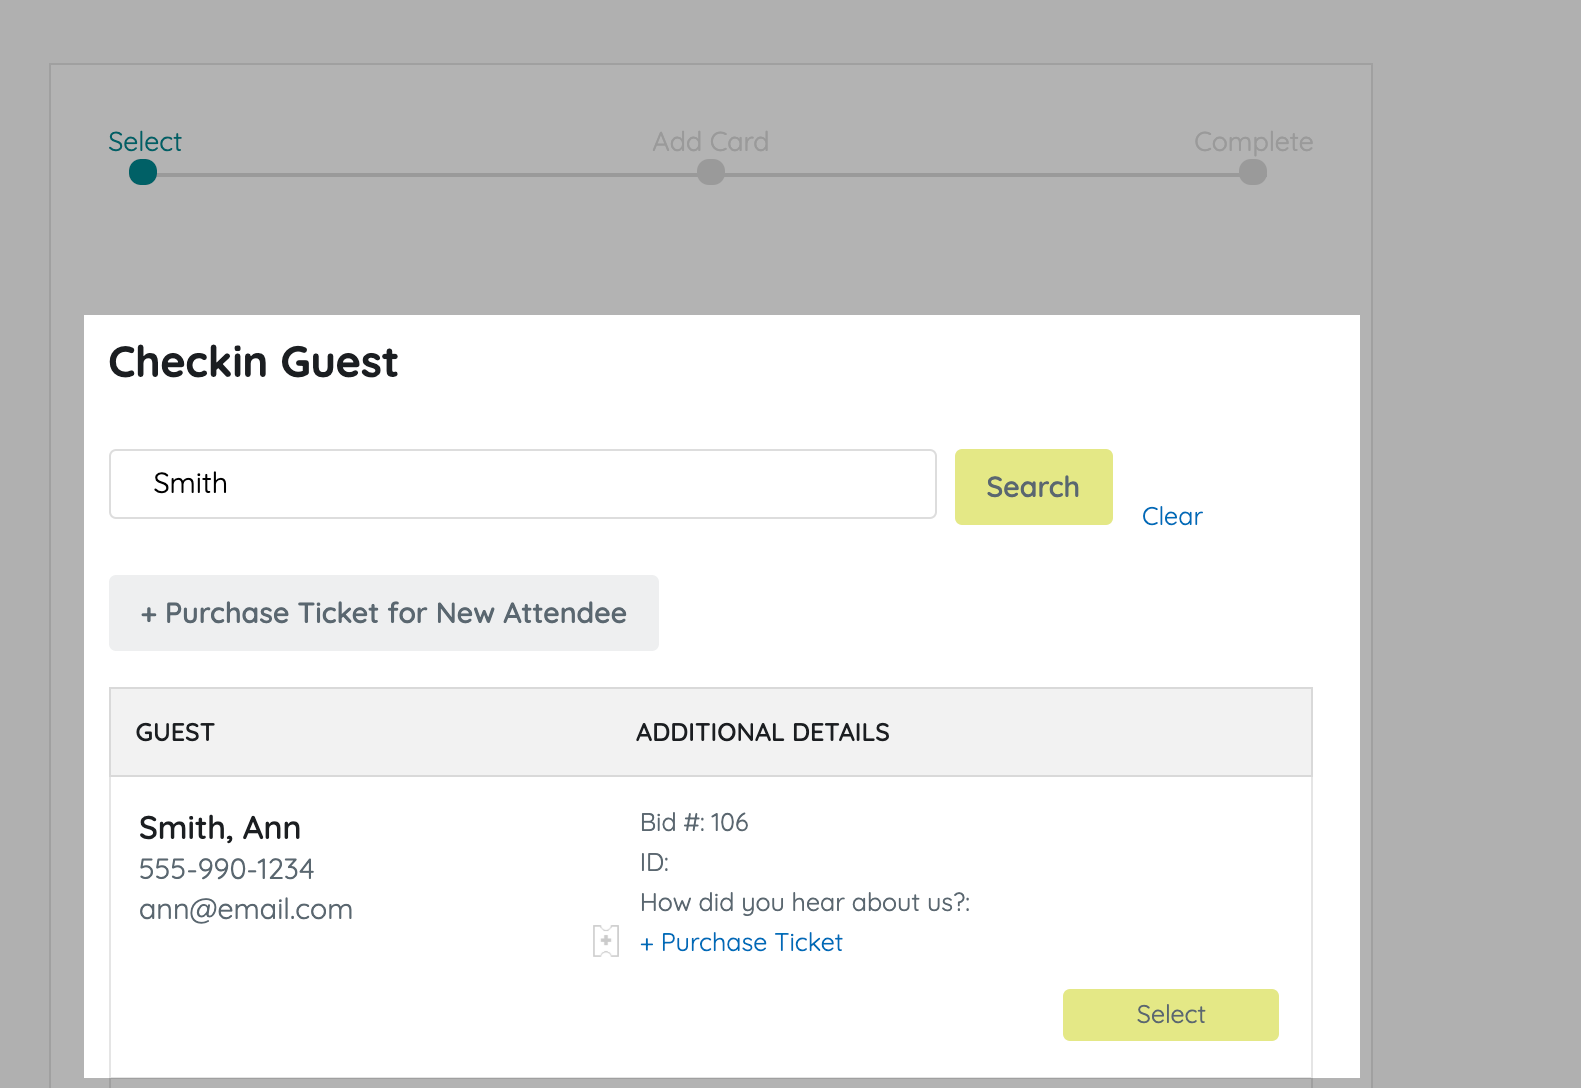
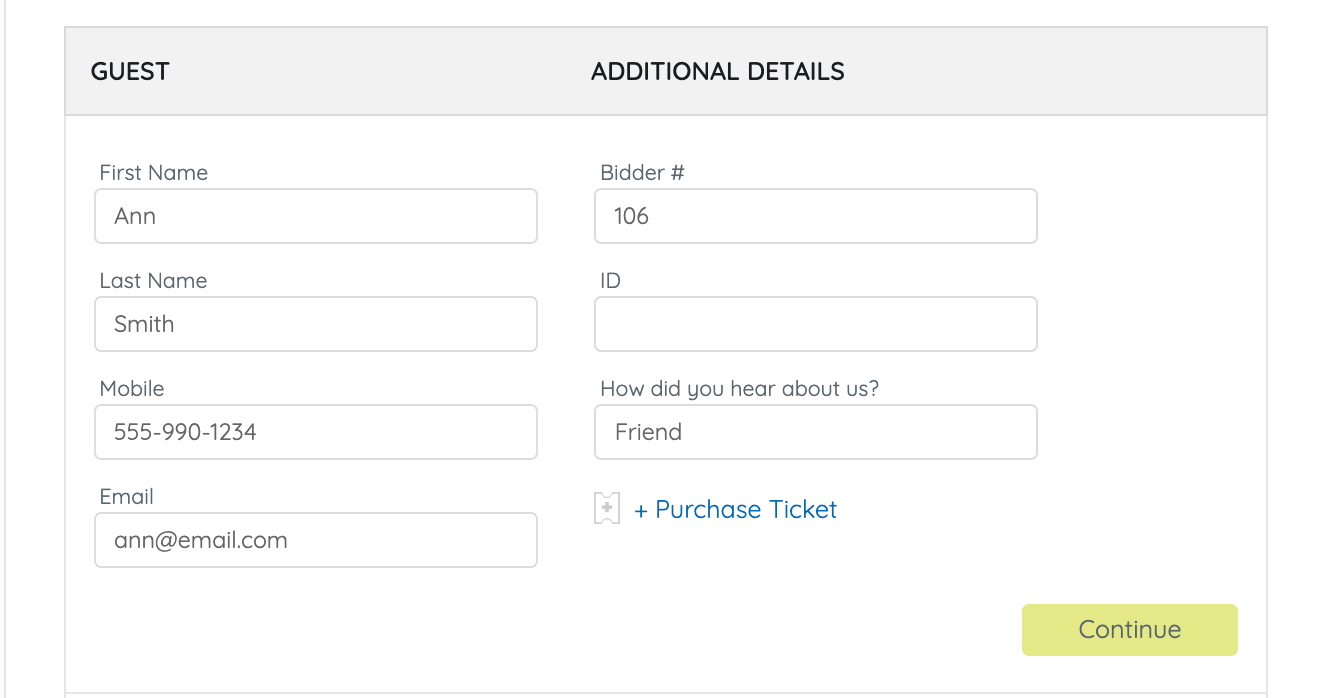
- Verify the contact information, then select Continue.
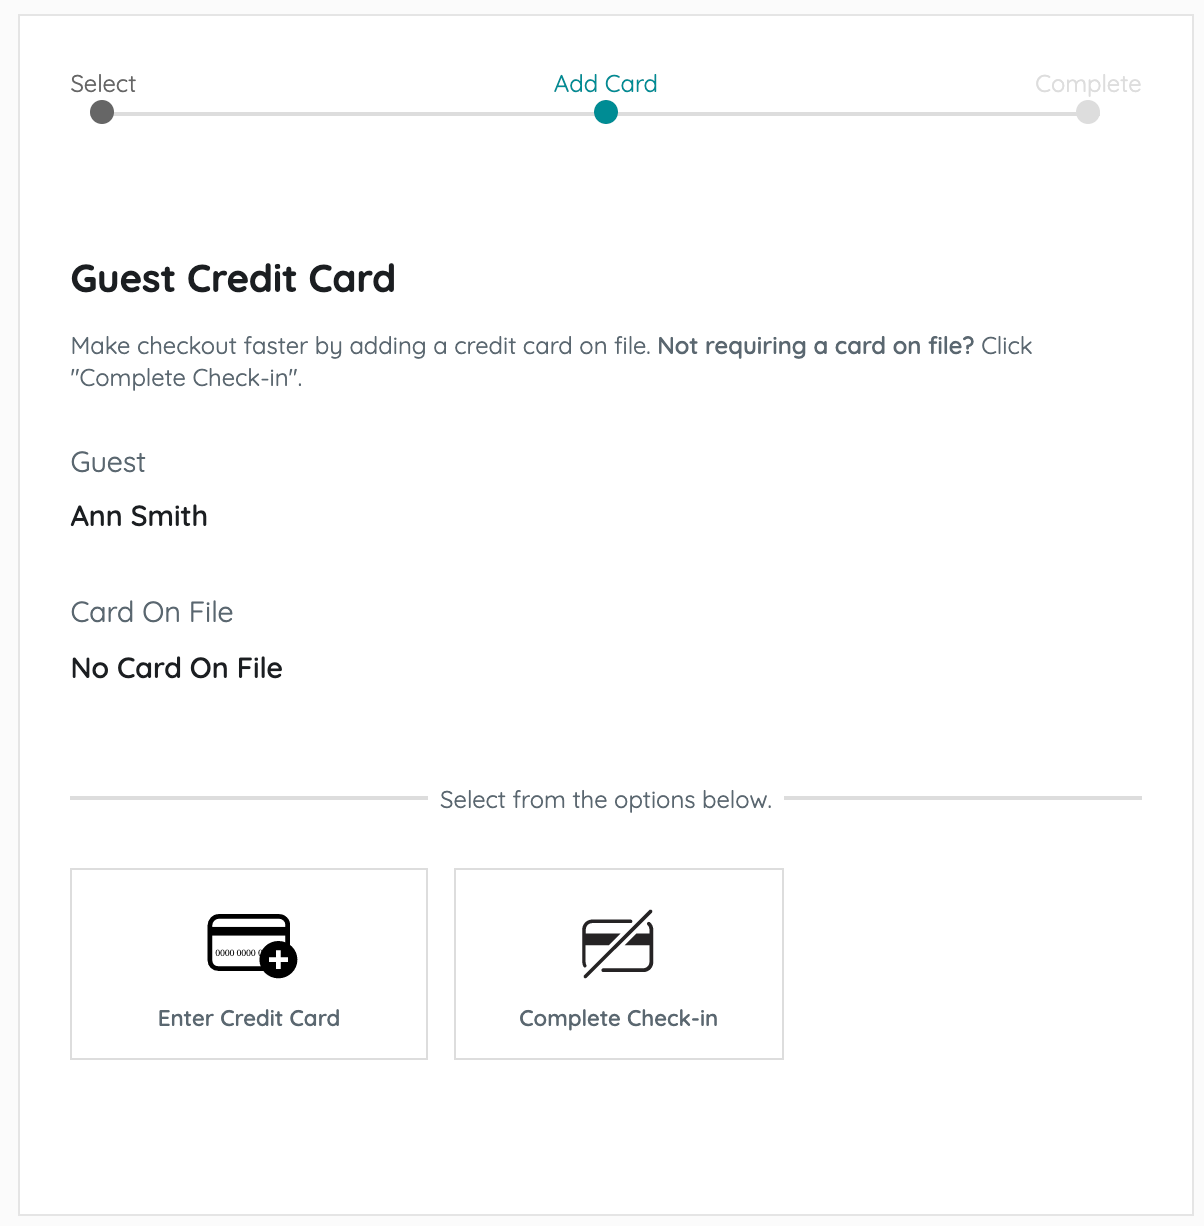 Confirm a credit card on file
- Click Complete Check-In for those who have a card on file, or are being prompted to add their own card when a credit card is required for activity.
- Click Enter Credit Card to manually enter a credit card and billing address or swipe a card when connected to a GiveSmart swiper.
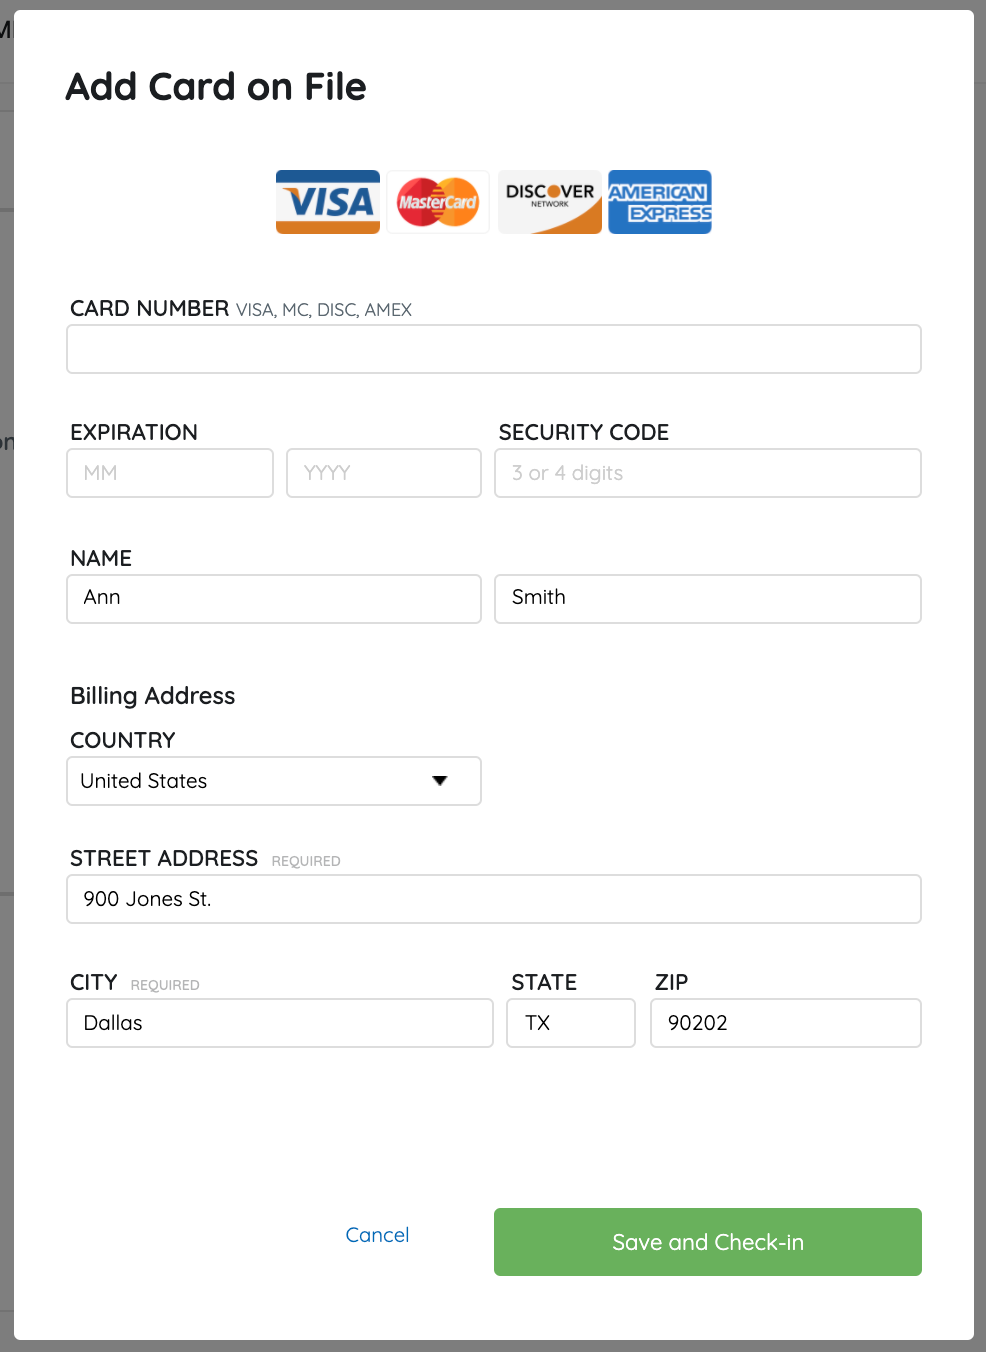
- Once complete, click Close.


 Confirm a credit card on file

Tip: Supporter can also add their own credit card to their account from the My Info page, through a text or email prompting them to add a card on file, or from their Pay page during self-checkout.