Add categories to assist in locating similar items or themes. Create categories such as Food and Dining, Classroom Baskets, or Experiences to provide an easy way for users to find all similar items offered. It also assists you in seeing the number of similar items offered to ensure there is a variety for donors to choose from. An item can be in multiple categories. Category names have a max of 20 characters and cannot contain special characters. There is a max of 200 characters allowed within the Categories field.
Add a Category
To a New Item
- From the Items Container within the Dashboard, click the More button ("···").
- Select Create New Item.
- Within the Categories field, add the custom category.
- Select outside the field to autosave.
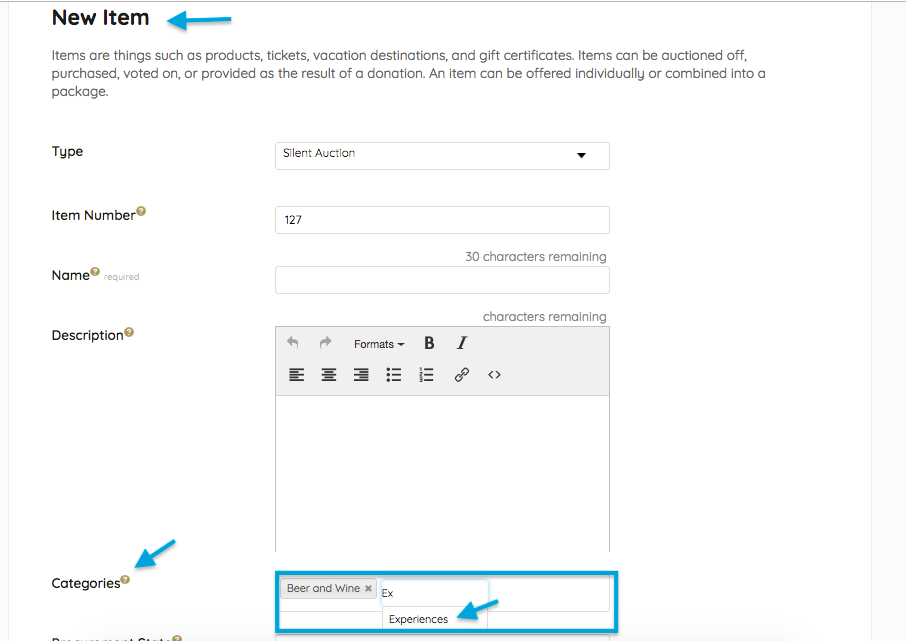
- Complete the New Item form.
- Click on Save.

To Multiple Items
- From the All Items view, check Select All box or select individually.
- Select Bulk Actions.
- Select Add Category.
- Enter New Category.
- Click Add.

Edit a Category
Category names cannot be edited, but you can remove the category you intended to edit and add a revised category name to items.
The steps below show how to change a category named Dinner to Dinner and Movie.
- Click Filter By and select Dinner.
- Check the box at the top left of the item list to select all the items included in Dinner.
- Select Bulk Actions.
- Select Add Category.
- Enter Dinner and Movie.
- Click Add.
- Click Filter By and select Dinner.
- Check the box at the top left of the item list to select all the items included in Dinner.
- Select Bulk Actions.
- Select Remove Category.
- Select Dinner from the dropdown list.
- Click OK.
Delete a Category
From an Item
- Locate and select the item.
- The Item detail will appear on the right-hand side.
- Click inside the Category field.
- Delete the category by clicking the X.
- Click outside the Category field to automatically save updates.
From Multiple Items
- Check all of the boxes next to the items included in the category you would like to remove.
- From the dropdown labeled Bulk Actions select Remove Category.
- Another dropdown will automatically generate, select the category to remove.
- Confirm the category should be removed.
- Once complete, the category will be removed from the Item Category dropdown.

Standard categories built into the campaign
My Activity
Provides a view of items winning, losing, purchased and donations. Visible to all users to track and manage auction activity.
All Items
List of all Silent, Live, Instant, Donate, and Vote items. Visible to all users.
Auction Items
All silent items. Visible to all users.
Items with No Bids
Silent items that do not have any bids. Visible to all users.
Unnumbered Items
All items not assigned an item number. Visible only to admins to keep track of which items need to be assigned a number.